Working With Supplier
Home / Documentation /
⚙️ Getting Started
🏪 Outlet
⚙️ Settings
🏧 Working With Counter
💰 Working Denomination
🛒 Make a Test Sale
👥 Employee Management
📅 Attendance
📋 Working with Tax
🏦 Account
📦 Working (General Item)
📦 Working (Variation Item)
📱 Working (IMEI Item)
🏷️ Working (Serial Item)
💊 Working (Medicine Item)
💳 Working (Installment Item)
🔧 Working (Service Item)
📊 Stock (General Item)
📊 Stock (Variation Item)
📊 Stock (IMEI Item)
📊 Stock (Serial Item)
📊 Stock (Medicine Item)
📊 Stock (Installment Item)
📥 Purchase (General Item)
📥 Purchase (Variation Item)
📥 Purchase (IMEI Item)
📥 Purchase (Serial Item)
📥 Purchase (Medicine Item)
📥 Purchase (Installment Item)
🏷️ Barcode & Label
🖨️ Working with Printer
🛒 Sale (General Item)
🛒 Sale (Variation Item)
🛒 Sale (IMEI Item)
🛒 Sale (Serial Item)
🛒 Sale (Medicine Item)
🛒 Sale (Installment Item)
🔧 Sale (Service Item)
🌐 Multivendor e-Commerce
📧 Working with Email
💬 Working with SMS
💳 Payment Gateway Setting
💬 Working with WhatsApp
👤 Working with Customer
🏢 Working with Supplier
📤 Purchase Return (General Item)
📤 Purchase Return (Variation Item)
📤 Purchase Return (IMEI Item)
📤 Purchase Return (Serial Item)
📤 Purchase Return (Medicine Item)
📤 Purchase Return (Installment Item)
🔄 Sale Return (General Item)
🔄 Sale Return (Variation Item)
🔄 Sale Return (IMEI Item)
🔄 Sale Return (Serial Item)
🔄 Sale Return (Medicine Item)
🔄 Sale Return (Installment Item)
📊 Dashboard
🎁 Promotion & Coupon
🏆 Loyalty
💳 Installment Sale
🔧 Warranty/Servicing
📈 Income
📉 Expense
💰 Salary/Payroll
📋 Quotation
🔄 Transfer (General Item)
🔄 Transfer (Variation Item)
🔄 Transfer (IMEI Item)
🔄 Transfer (Serial Item)
🔄 Transfer (Medicine Item)
🔄 Transfer (Installment Item)
❌ Damage (General Item)
❌ Damage (Variation Item)
❌ Damage (IMEI Item)
❌ Damage (Serial Item)
❌ Damage (Medicine Item)
❌ Damage (Installment Item)
🏢 Fixed Asset
📊 Report
🔄 Update Software
❌ Uninstall License
Add Supplier
To add a new supplier, follow these steps:
Expand the Purchase menu from the left sidebar.
Click on the Add Supplier option.
Fill in all required supplier details in the form.
Click Submit to save the new supplier in the system.
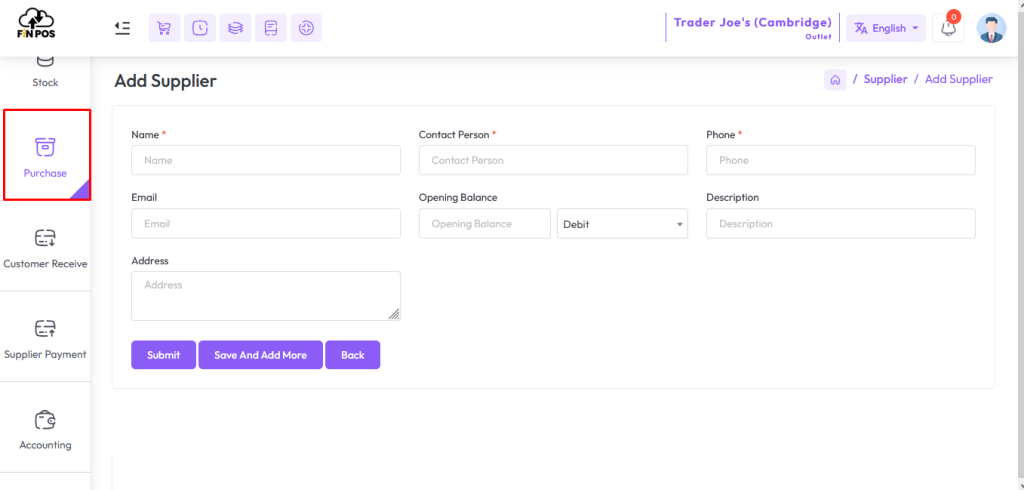
Fill up the required fields carefully and submit the form:
Enter all mandatory information in the form.
Double-check the details for accuracy.
Click the Submit button to save the data.
A confirmation message will appear once the submission is successful.
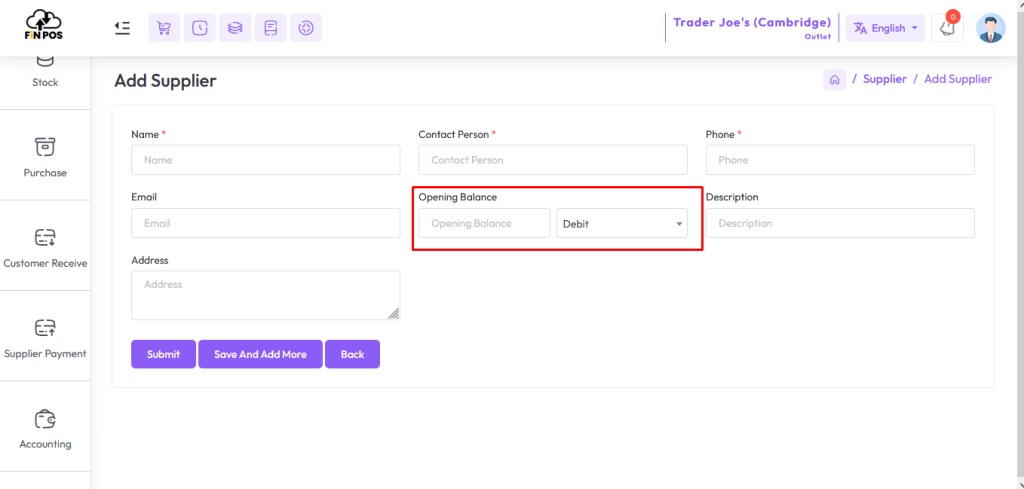
Opening Balance
The opening balance for a supplier typically refers to any outstanding amount that the supplier owes before starting to use the POS system for transactions.
Enter the opening balance in the Opening Balance field. Select Debit if the supplier has past dues.
Enter the opening balance in the Opening Balance field. Select Credit if the supplier has received money in the past.
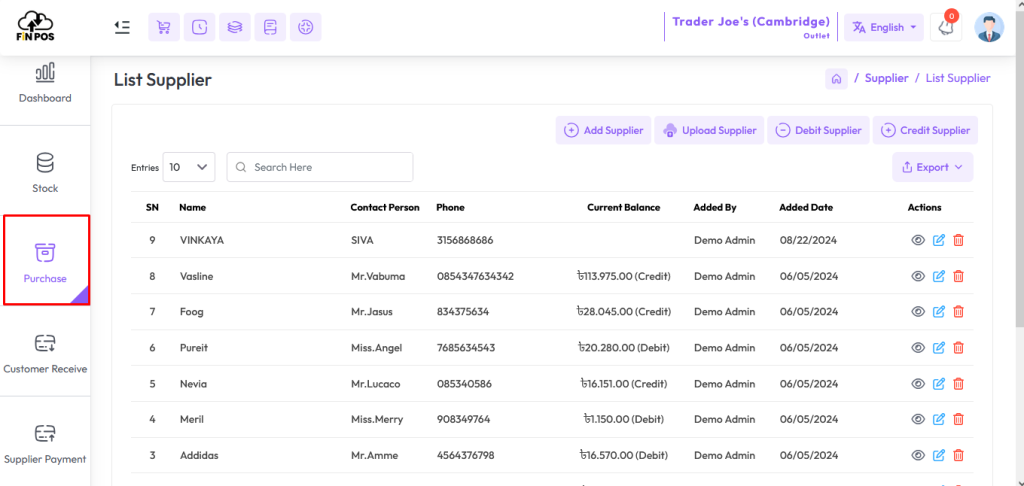
List Supplier
To view the list of suppliers, follow these steps:
Expand the Purchase menu from the left sidebar.
Click on the List Supplier option.
The system will display all existing suppliers.
You can review, edit, or delete any supplier from this list.
Debit Supplier
To view debit suppliers, follow these steps:
Expand the Purchase menu from the left sidebar.
Click on the List Supplier option.
Locate the Debit Supplier button on the right side of the screen.
Click the Debit Supplier button to view suppliers with debit balances.
Review the list to check outstanding amounts for each supplier.
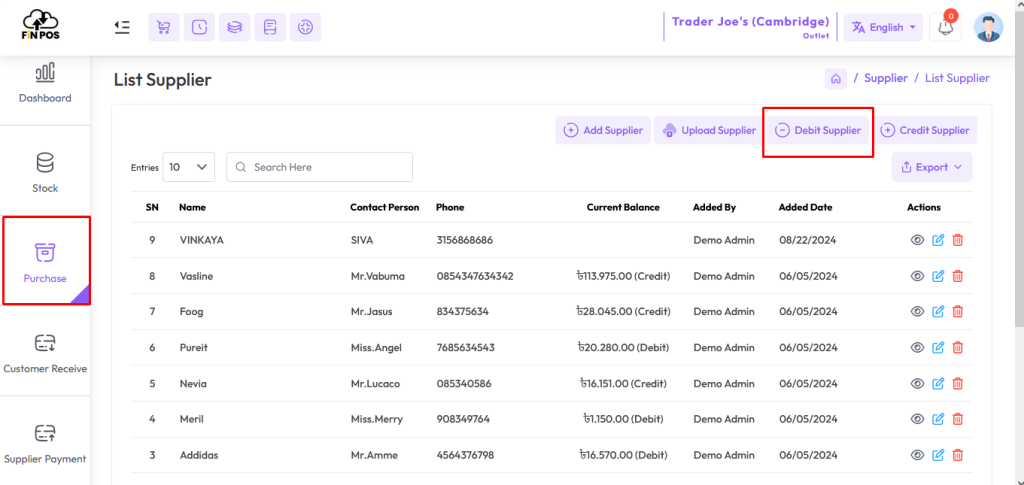
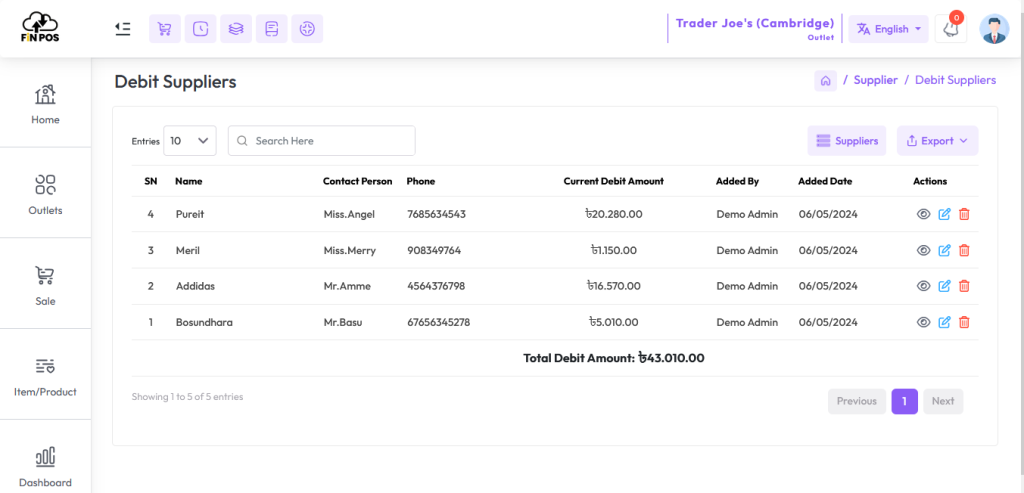
After clicking on the Debit Supplier button, you can view the list of suppliers with debit balances:
The system will display all debit suppliers.
Each entry shows the supplier name and outstanding amount.
You can review or take action on any supplier from this list.
An example is shown in the snapshot below for reference.
Credit Supplier
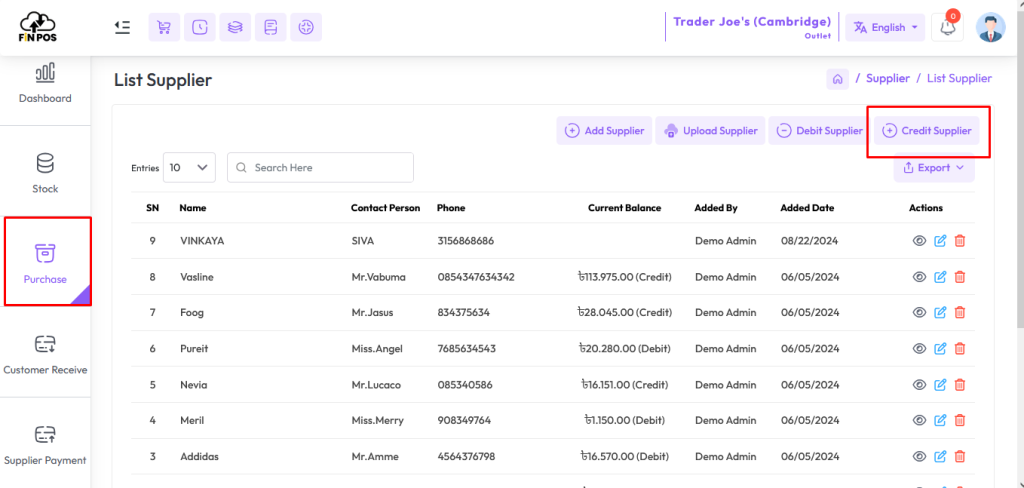
To view Credit Supplier Expand Purchase Menu form the left sidebar, After clicking on List Supplier you will see a button on the right called Credit Supplier, click on it.
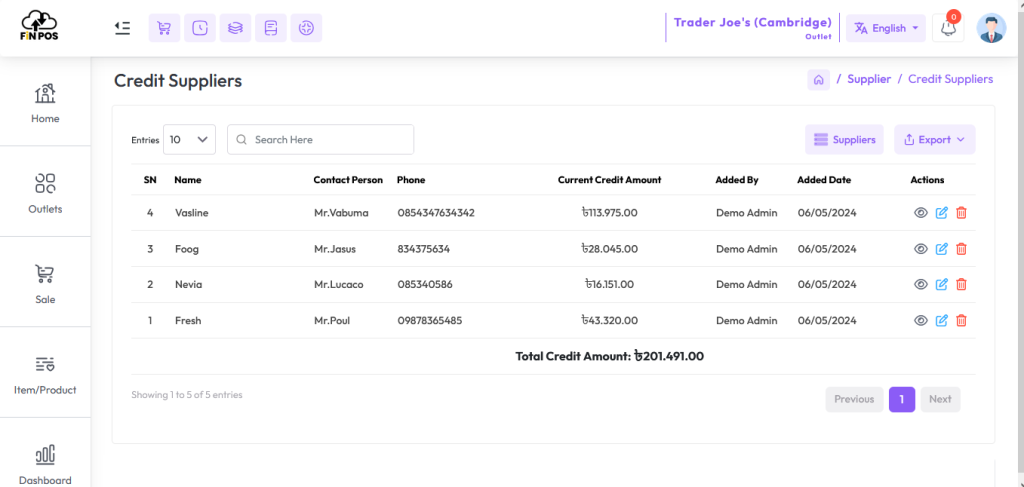
After clicking on the Debit Supplier button, you can view the list of credit suppliers:
The system will display all credit suppliers.
Each entry shows the supplier name and the credit amount.
You can review or manage any supplier from this list.
An example is shown in the snapshot below for reference.
Bulk Supplier Upload
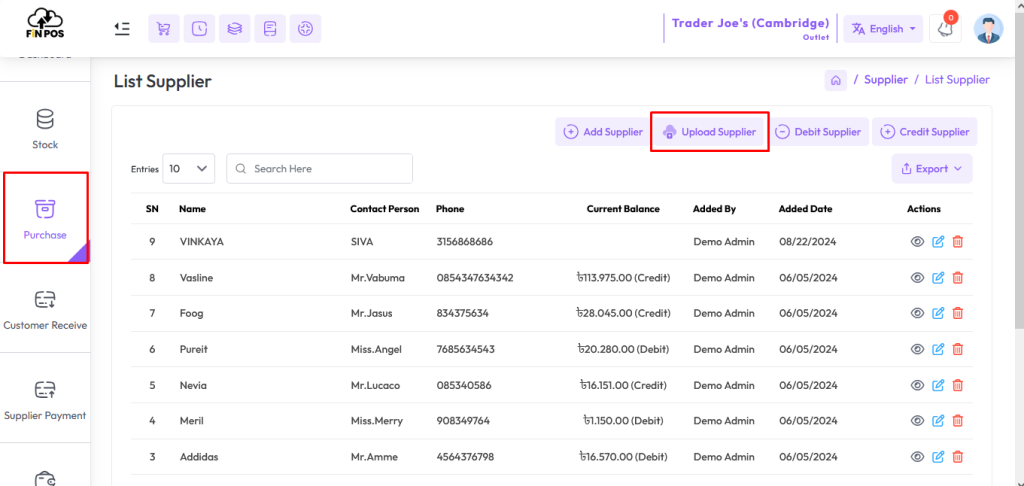
To perform a bulk upload of suppliers, follow these steps:
Expand the Purchase menu from the left sidebar.
Click on the List Supplier option.
Click on the Upload Supplier button.
Follow the instructions to upload multiple suppliers at once.
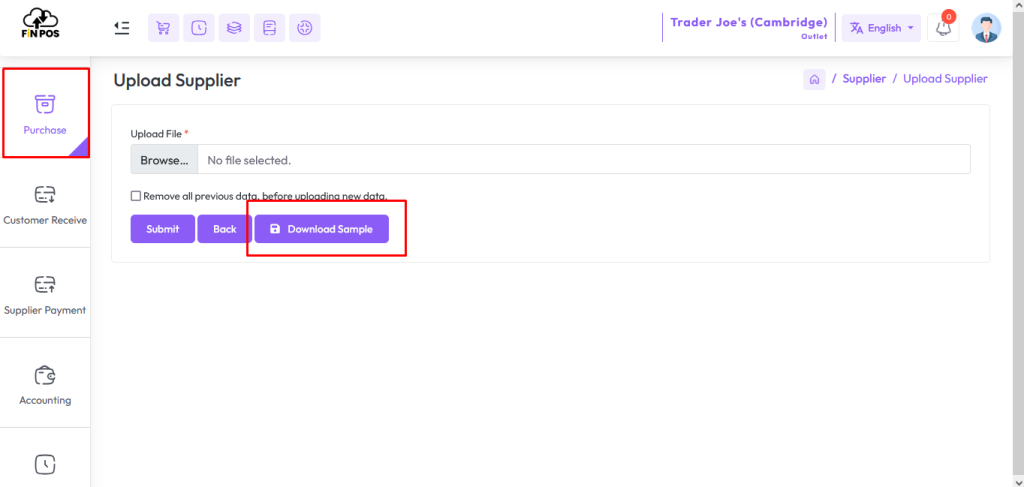
To get a sample Excel file for bulk upload, follow these steps:
Click on the Download Sample button.
The sample file will be downloaded to your system.
Open the file to review the required format and fields.
Use this sample as a template to prepare your supplier data for upload.
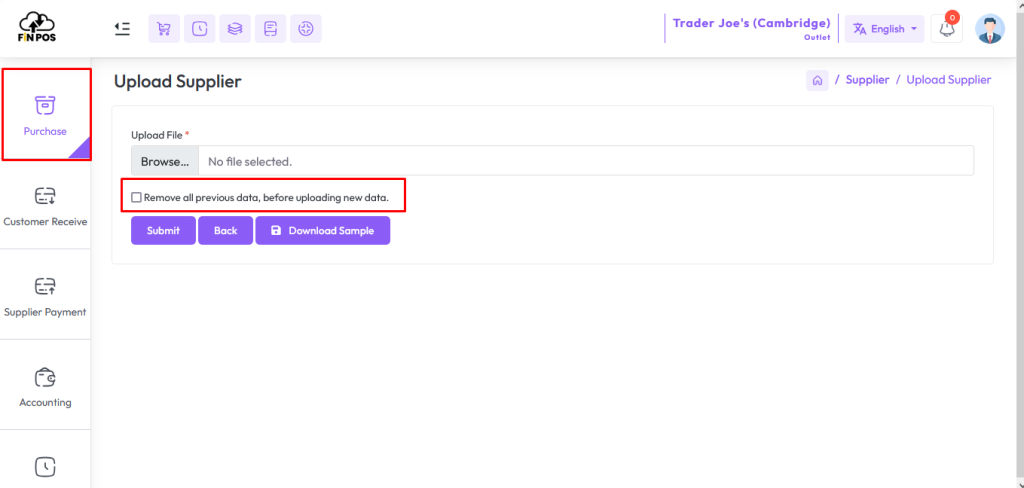
Check “Remove all previous data, before uploading new data” to delete all previous suppliers while uploading new suppliers.
Leave it unchecked if you don’t want to delete previous suppliers.
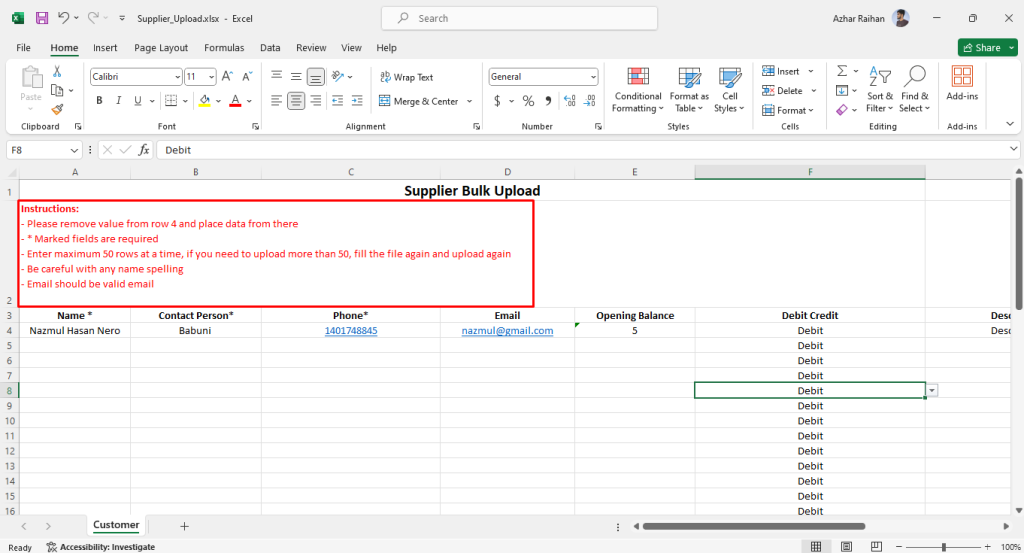
Before uploading supplier data, make sure to read the Excel file guidelines carefully:
Review all instructions provided in the guidelines.
Ensure the data matches the required format and fields.
Correct any errors or inconsistencies in the file.
Following the guidelines helps prevent upload failures or errors.
After preparing the Excel file, upload it to add suppliers in bulk:
Click on the Upload button in the system.
Select the prepared Excel file from your computer.
Ensure the file is in the correct format before uploading.
The system will process the file and add the suppliers automatically.
Add Supplier Payment
To make a supplier payment, follow these steps:
Expand the Supplier Payment menu from the left sidebar.
Click on the Add Supplier Payment option.
Fill in the required payment details in the form.
Click Submit to save and process the supplier payment.
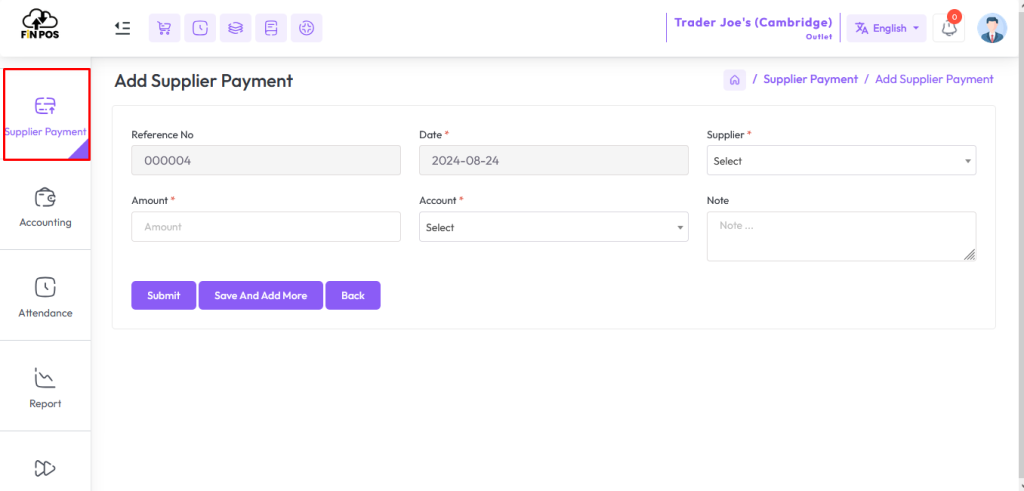
Fill up the required fields carefully and submit the form:
Enter all mandatory information in the form.
Double-check the details for accuracy.
Click the Submit button to save the data.
A confirmation message will appear once the submission is successful.
Print Payment Receipt
To Print “Supplier Payment” receipt expand the Suppliery Payment menu from the left sidebar and click on “List Supplier Payment” menu afer that click on the “Print Invoice” button to print “Supplier Payment” receipt
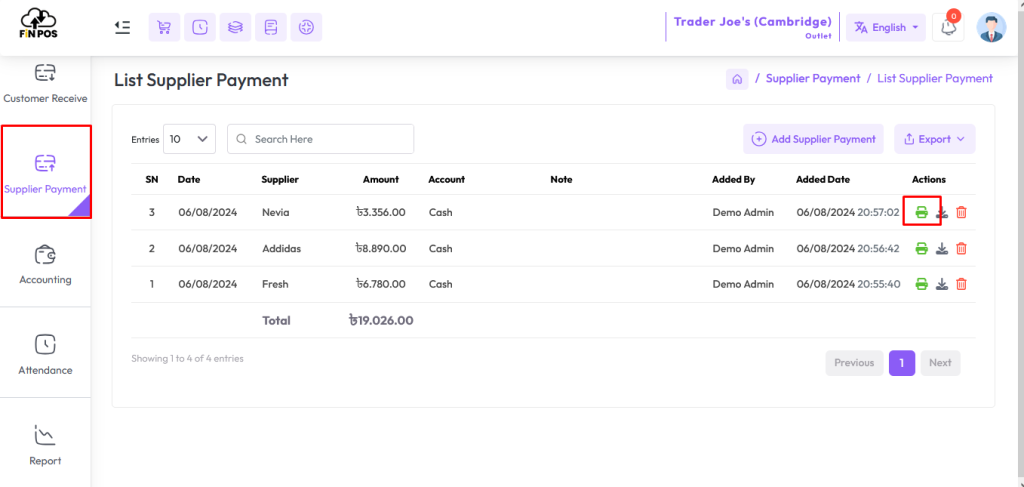
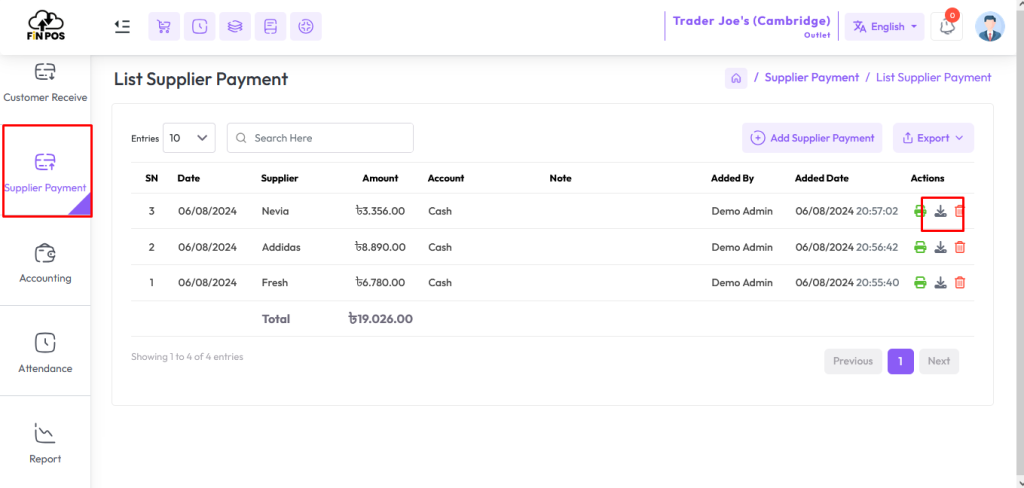
After making a supplier payment, you can download the payment receipt:
Go to the Actions column for the completed payment.
Click on the Download Invoice button.
The receipt will be saved to your system.
Use this receipt for record-keeping or reference purposes.
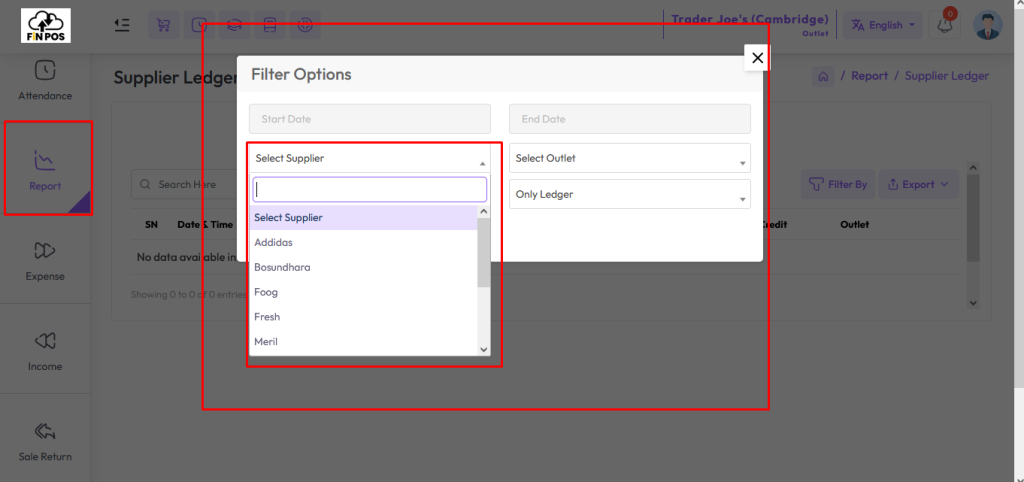
Supplier Ledger
To view Supplier Ledger Report Expand Report Menu and click Supplier Ledger Report from the left sidebar. select a date to view the report within a specified date if needed. select a Supplier also you can select outlet from the outlet field to filter report according to outlet.
Supplier Balance Report
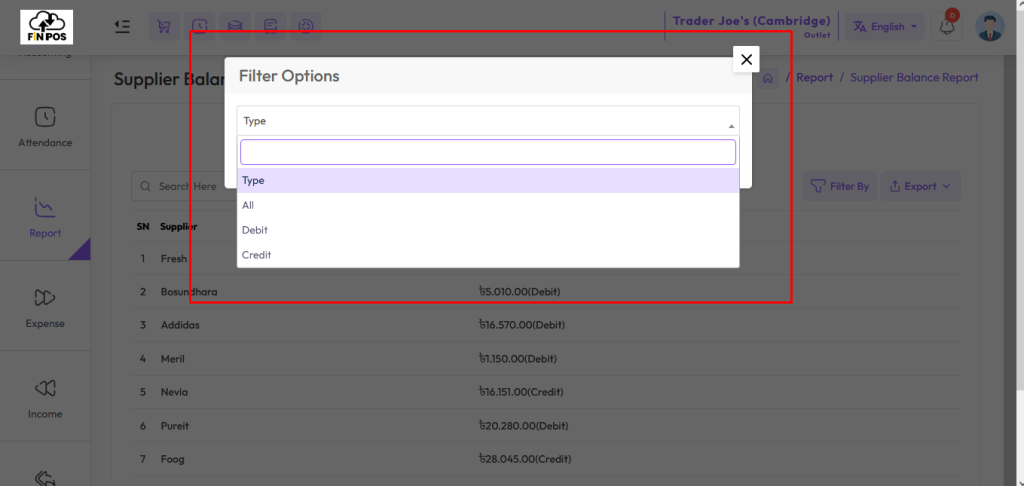
To view Supplier Balance Report Expand Report Menu and click Supplier Balance Report from the left sidebar. select Supplier balance type if needed also you can see “Debit” and “Credit” both Suppliers.