Make A Test Sale
Home / Documentation /
⚙️ Getting Started
🏪 Outlet
⚙️ Settings
🏧 Working With Counter
💰 Working Denomination
🛒 Make a Test Sale
👥 Employee Management
📅 Attendance
📋 Working with Tax
🏦 Account
📦 Working (General Item)
📦 Working (Variation Item)
📱 Working (IMEI Item)
🏷️ Working (Serial Item)
💊 Working (Medicine Item)
💳 Working (Installment Item)
🔧 Working (Service Item)
📊 Stock (General Item)
📊 Stock (Variation Item)
📊 Stock (IMEI Item)
📊 Stock (Serial Item)
📊 Stock (Medicine Item)
📊 Stock (Installment Item)
📥 Purchase (General Item)
📥 Purchase (Variation Item)
📥 Purchase (IMEI Item)
📥 Purchase (Serial Item)
📥 Purchase (Medicine Item)
📥 Purchase (Installment Item)
🏷️ Barcode & Label
🖨️ Working with Printer
🛒 Sale (General Item)
🛒 Sale (Variation Item)
🛒 Sale (IMEI Item)
🛒 Sale (Serial Item)
🛒 Sale (Medicine Item)
🛒 Sale (Installment Item)
🔧 Sale (Service Item)
🌐 Multivendor e-Commerce
📧 Working with Email
💬 Working with SMS
💳 Payment Gateway Setting
💬 Working with WhatsApp
👤 Working with Customer
🏢 Working with Supplier
📤 Purchase Return (General Item)
📤 Purchase Return (Variation Item)
📤 Purchase Return (IMEI Item)
📤 Purchase Return (Serial Item)
📤 Purchase Return (Medicine Item)
📤 Purchase Return (Installment Item)
🔄 Sale Return (General Item)
🔄 Sale Return (Variation Item)
🔄 Sale Return (IMEI Item)
🔄 Sale Return (Serial Item)
🔄 Sale Return (Medicine Item)
🔄 Sale Return (Installment Item)
📊 Dashboard
🎁 Promotion & Coupon
🏆 Loyalty
💳 Installment Sale
🔧 Warranty/Servicing
📈 Income
📉 Expense
💰 Salary/Payroll
📋 Quotation
🔄 Transfer (General Item)
🔄 Transfer (Variation Item)
🔄 Transfer (IMEI Item)
🔄 Transfer (Serial Item)
🔄 Transfer (Medicine Item)
🔄 Transfer (Installment Item)
❌ Damage (General Item)
❌ Damage (Variation Item)
❌ Damage (IMEI Item)
❌ Damage (Serial Item)
❌ Damage (Medicine Item)
❌ Damage (Installment Item)
🏢 Fixed Asset
📊 Report
🔄 Update Software
❌ Uninstall License
In this article we will show you how to create a Sell by adding a Product in a very simple way. Follow the instructions below step by step.
Add a Item/Product
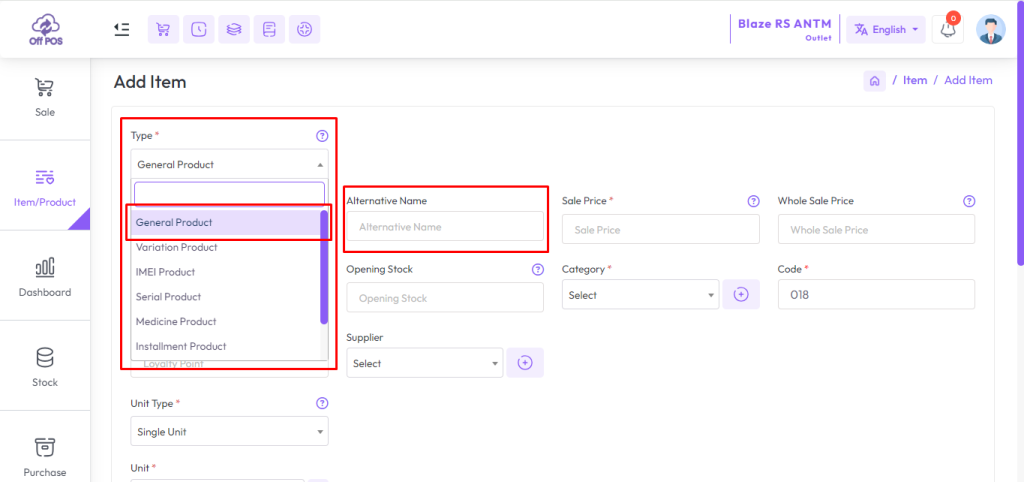
To create a new Product expand the Item/Product menu from the left sidebar after that click on the Add Item/Product menu.

Select a type from the Type field, and enter an “Alternative Name” for this product, “Alternative Name” for a product typically refers to an additional name or label that can be used to identify the product in the system, fill up the all required field and hit the submit button to Add Item/Product.
Make a Sale
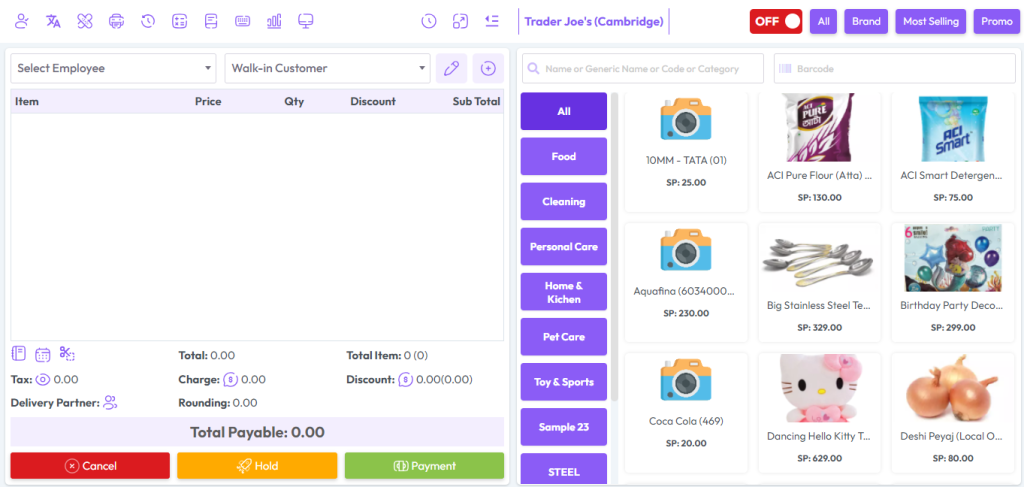
To Sales entry or sale product Click on the “POS” button from the top header or expand the Sale Menu from the left sidebar after that click on the POS menu.

After clicking you will see an interface like below snapshot.
“Lets try to Sale a Single Product!”
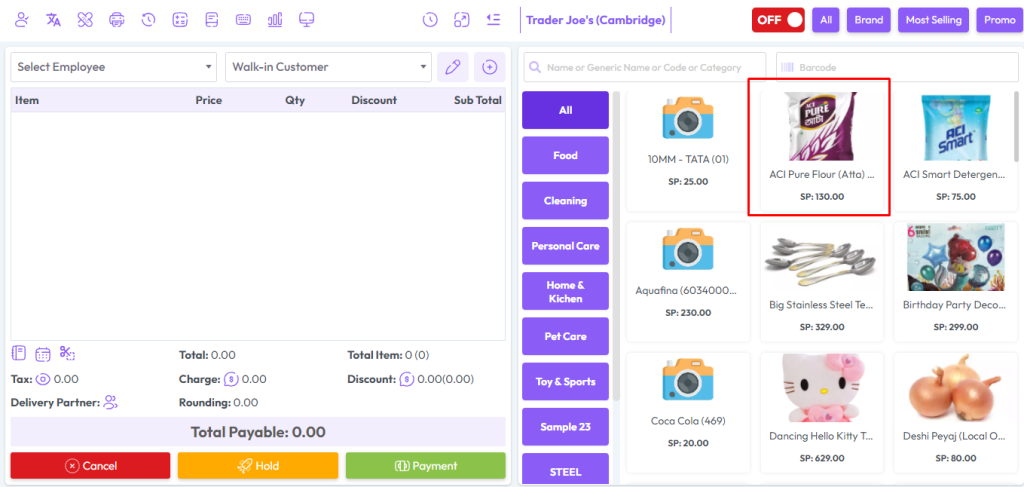
To sell a product, click on an Item, after clicking that a popup modal will be shown.
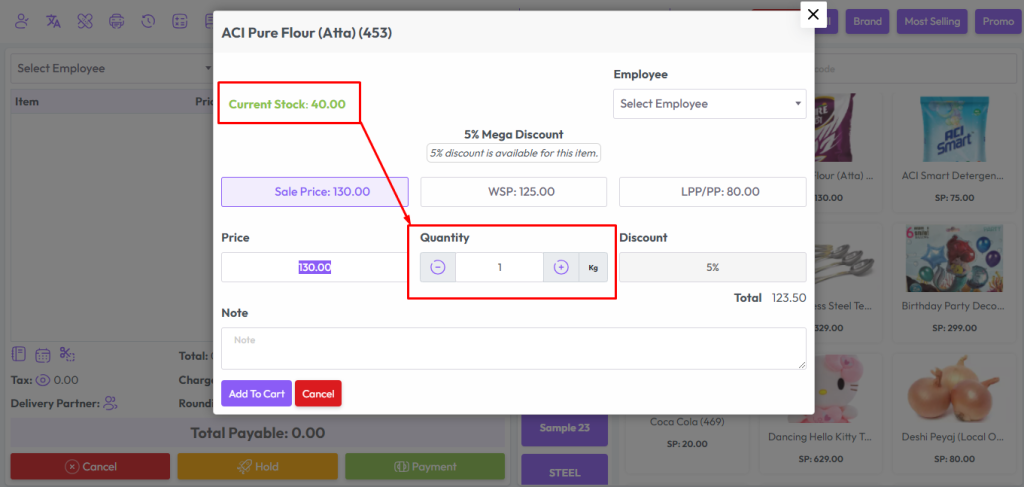
Here you will see the current stock of this product, Select Employee from the employee field if this product sale employee-wise, Change the price if needed, LPP = Last Purchase Price of this product, WSP=Wholde Sale Price of this product, Increase Quantity if you need, enter discount if you have permission after that hit “Add To Cart” button to add this product in the cart.
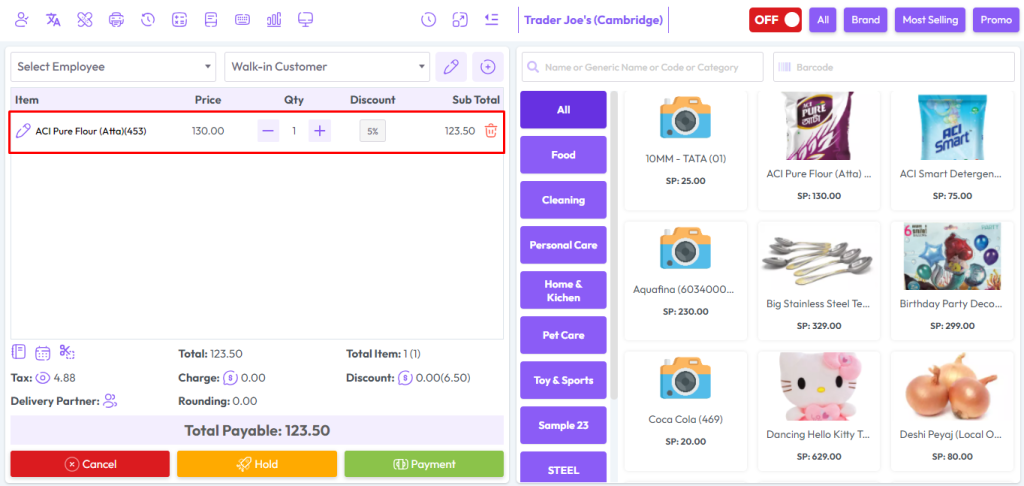
After Clicking on the “Add to Cart” button Item will be added to the cart, After that Select Employee from the Employee field, and select Customer from the Customer field.
Total Item 1(1) means 1 Item 1 Quantity.
Click here to read about the Tax Setting article.
Click here to read the article on Discount Permission for Employee. How to give discoun?
How to work delivery partner?
Click here to read how rounding works on Total Payable?
Click on the “Payment” button for next Step.
“Payment” button for next Step.
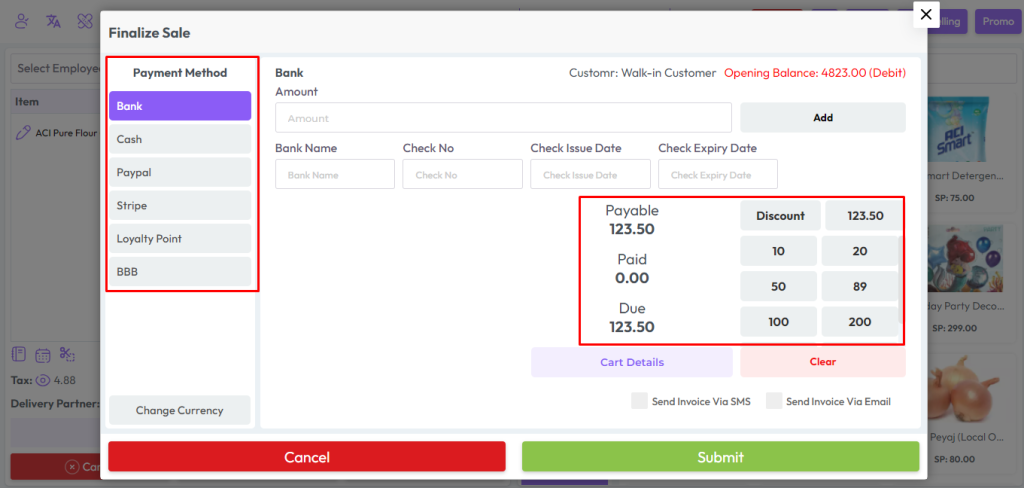
In the finalized sale, you will see payment method options on the left side, select a payment method option from there, select amount by clicking denomination amount (Note: We have discuss Denomination breifly in dinomination article) or enter amont in Amount field and hit the Add Button

After clicking “Add” button payment added in payment section in my case I’ve select Bank, after that select Send Invoice Via SMS, Send Invoice Via Emal, Send Invoice Via Whatsapp as per your need and hit the submit button to Sale this product
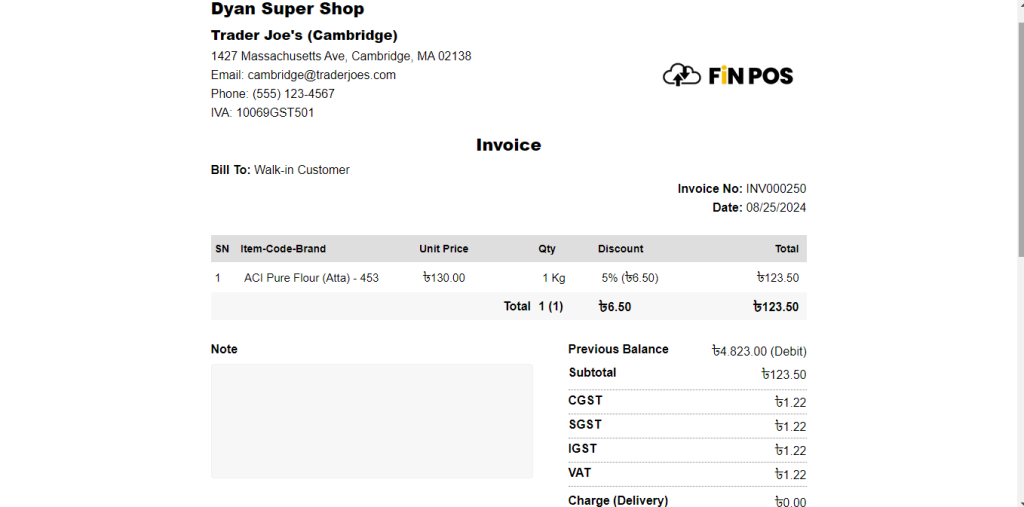
After Sale Success you will get an invoice, according to printer setting