
Working with Variation Item
Home / Documentation /
⚙️ Getting Started
🏪 Outlet
⚙️ Settings
🏧 Working With Counter
💰 Working Denomination
🛒 Make a Test Sale
👥 Employee Management
📅 Attendance
📋 Working with Tax
🏦 Account
📦 Working (General Item)
📦 Working (Variation Item)
📱 Working (IMEI Item)
🏷️ Working (Serial Item)
💊 Working (Medicine Item)
💳 Working (Installment Item)
🔧 Working (Service Item)
📊 Stock (General Item)
📊 Stock (Variation Item)
📊 Stock (IMEI Item)
📊 Stock (Serial Item)
📊 Stock (Medicine Item)
📊 Stock (Installment Item)
📥 Purchase (General Item)
📥 Purchase (Variation Item)
📥 Purchase (IMEI Item)
📥 Purchase (Serial Item)
📥 Purchase (Medicine Item)
📥 Purchase (Installment Item)
🏷️ Barcode & Label
🖨️ Working with Printer
🛒 Sale (General Item)
🛒 Sale (Variation Item)
🛒 Sale (IMEI Item)
🛒 Sale (Serial Item)
🛒 Sale (Medicine Item)
🛒 Sale (Installment Item)
🔧 Sale (Service Item)
🌐 Multivendor e-Commerce
📧 Working with Email
💬 Working with SMS
💳 Payment Gateway Setting
💬 Working with WhatsApp
👤 Working with Customer
🏢 Working with Supplier
📤 Purchase Return (General Item)
📤 Purchase Return (Variation Item)
📤 Purchase Return (IMEI Item)
📤 Purchase Return (Serial Item)
📤 Purchase Return (Medicine Item)
📤 Purchase Return (Installment Item)
🔄 Sale Return (General Item)
🔄 Sale Return (Variation Item)
🔄 Sale Return (IMEI Item)
🔄 Sale Return (Serial Item)
🔄 Sale Return (Medicine Item)
🔄 Sale Return (Installment Item)
📊 Dashboard
🎁 Promotion & Coupon
🏆 Loyalty
💳 Installment Sale
🔧 Warranty/Servicing
📈 Income
📉 Expense
💰 Salary/Payroll
📋 Quotation
🔄 Transfer (General Item)
🔄 Transfer (Variation Item)
🔄 Transfer (IMEI Item)
🔄 Transfer (Serial Item)
🔄 Transfer (Medicine Item)
🔄 Transfer (Installment Item)
❌ Damage (General Item)
❌ Damage (Variation Item)
❌ Damage (IMEI Item)
❌ Damage (Serial Item)
❌ Damage (Medicine Item)
❌ Damage (Installment Item)
🏢 Fixed Asset
📊 Report
🔄 Update Software
❌ Uninstall License
Add a Variation Product
Based on the type of business and the nature of the product, 7 types of products are maintained in FiNPOS namely General Products, Variation Products, IMEI Products, Serial Products, Medicine/Expiry Products, Installment Products, and Servicing. These categories help businesses organize their items properly according to their usage.
Here we will discuss only “Variation Product”.
Variation Product is best applicable for Fashion, Clothing, Footwear, and Dressing items, where the same product comes in different sizes, colors, or styles. Instead of creating separate entries for each option, all variations can be managed under one main product.
To create a new variation item/product, expand the Item/Product menu from the left sidebar and then click on the Add Item/Product menu.

In this lesson, we will demonstrate how to add a Variation Product.
First, select “Variation Product” from the Type field and then enter an Alternative Name for the product. An Alternative Name simply means an additional name, tag, or label that can also be used to identify and search for the product within the system.
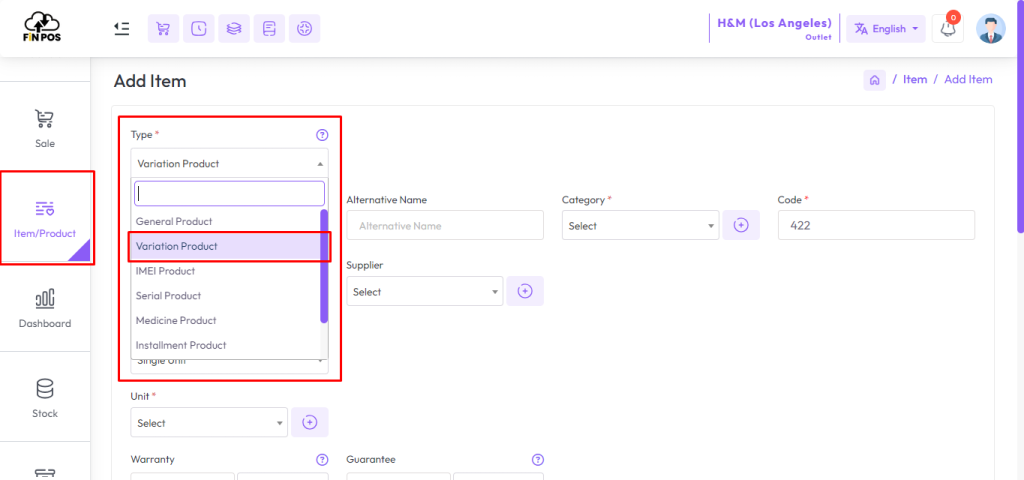
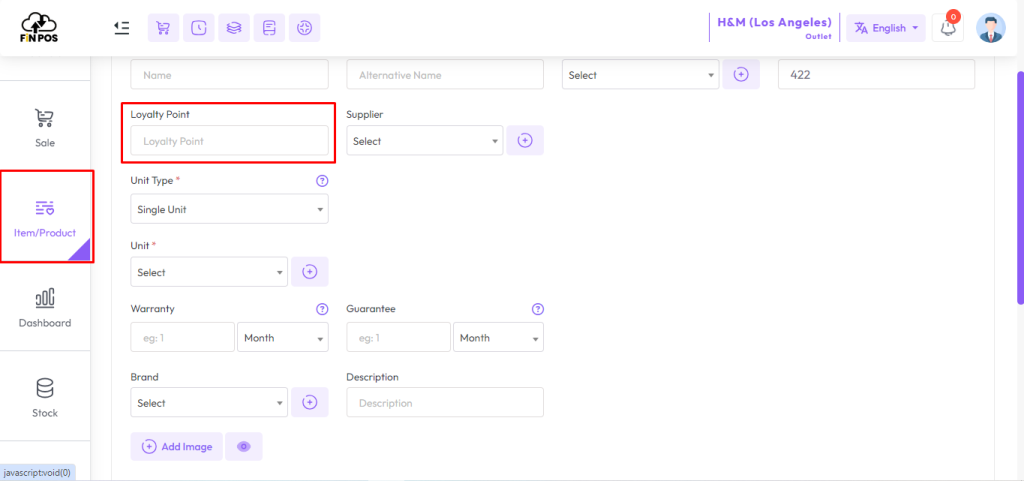
Single Unit and Double Unit can be applied on a product depending on the business requirement.
The Unit Type plays an important role in the product management system, so let’s understand how the unit system works. In FiNPOS, there are two types of unit systems:
Single Unit
Double Unit
What is Single Unit or Double Unit and how do they work?
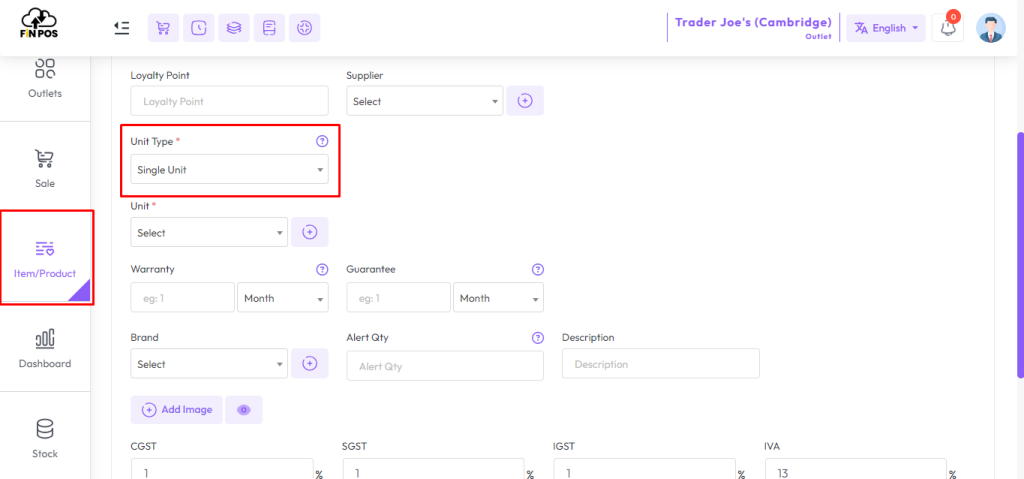
Single Unit Type
When you select the Unit Type = Single Unit, you also need to choose a unit from the Unit field.
In this case, it means the product is purchased and sold in the same unit without any conversion.
Double Unit Type
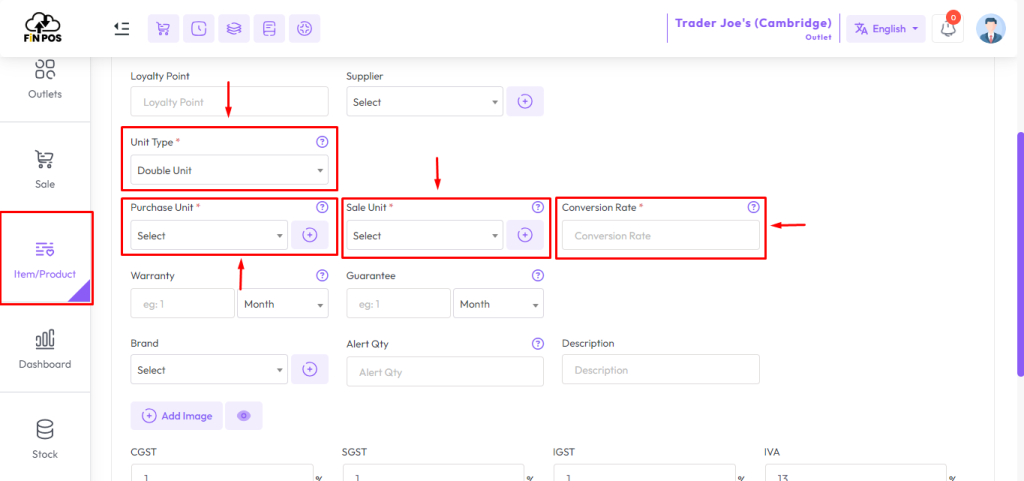
When you select Unit Type “Double Unit” then you see an additional 3 fields, Purchase Unit, Sale Unit, and Conversion rate respectively.
Select Purchase Unit from the “Purchase Unit” field, Select Sale Unit from the “Sale Unit” field, and enter conversion rate to convert purchase unit to sale unit.
Lets try to understand double unit type with a example
Let’s assume you select “Purchase Unit” as “Box”, and “Single Unit” as “PCS” It means you purchased this product Box and you want to sell “PCS”
For example: if a box contains 12 Shirt, and you want to convert each Shirt as a “Single Unit” then you should convertion rate “12” 12/12=1, Now Single Shirt you can sale as “Single Unit”
if you convert a Box Shirt into 6 “Pare” that means 2 Shirt = 1 pare then you should enter convertion rate 6, A box Shirt = 12, convertion rate 6, 12/6=2, now you can sale 1 pare = 2 Shirt as a Sinle Unit.
NB: As you purchased a box of Shirt, you enter the purchase price of the entire box of Shirt in the Purchase Price field, not just the purchase price of one Shirt.
If you have a Warranty Or Gurantee of a product then you should enter amount Warranty and Warranty Type like Day,Month or Year. If you select Warranty 6 month that means 6 months will be counted from when the product is sold. This will work for the rest and the guarantee.

Warranty Gurantee Show in invoice.

You will see an interface similar to the snapshot below for the Variation Product.
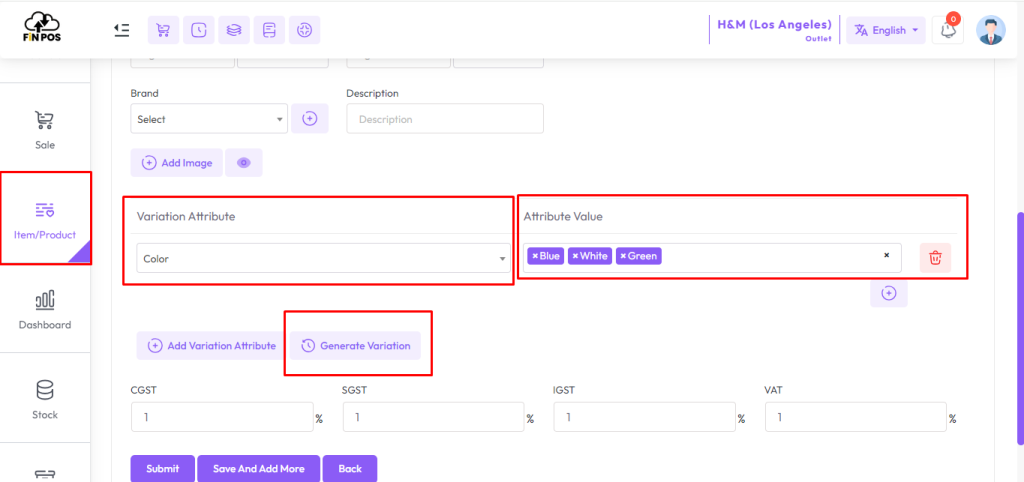
In this interface, two important fields will appear: Variation Attribute and Attribute Value.
An example of a Variation Attribute is Color (such as White, Green, Blue, etc.).
An example of an Attribute Value is Size (such as S, M, L, XL, XXL, etc.).

Select an attribute from the Variation Attributes field.
Next, choose a value from the Variation Value field — here you can also select multiple values at the same time if needed.
Finally, click on the Generate button to create the desired product combinations.
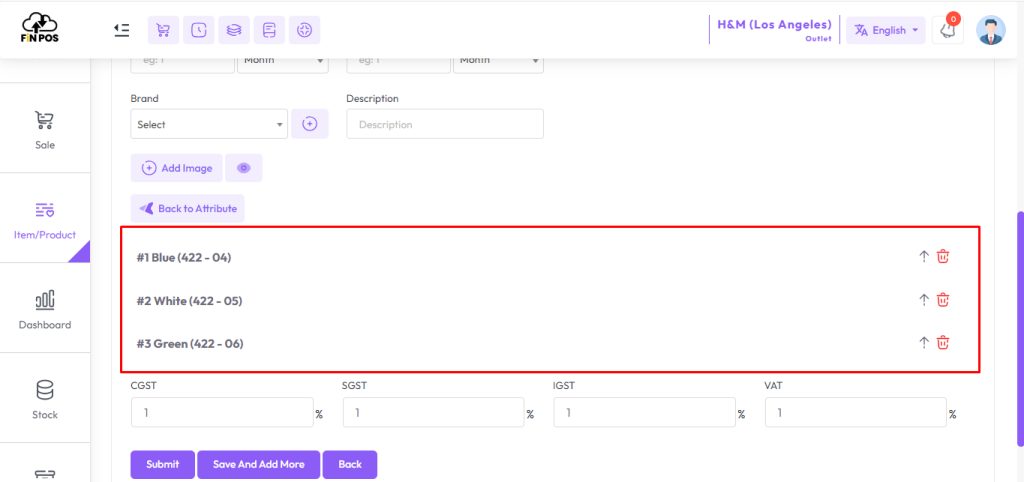
After generating the variation attribute and variation values combination you will see the interface below.
Fill up the required fields for the variation item.

Click on the delete icon above the variation combination you want to delete.

Outlet-wise stock needs to be set separately for each variation item.
Click on the Outlet field to set the stock.
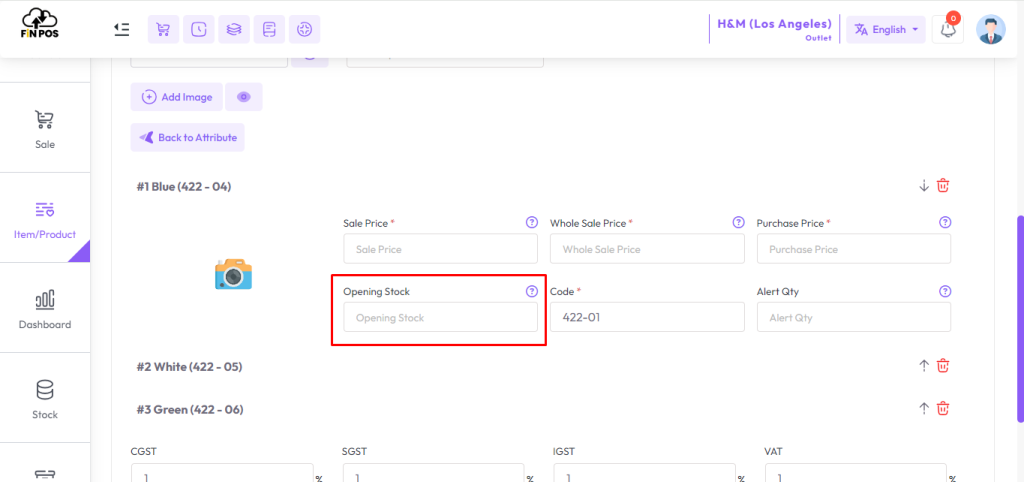
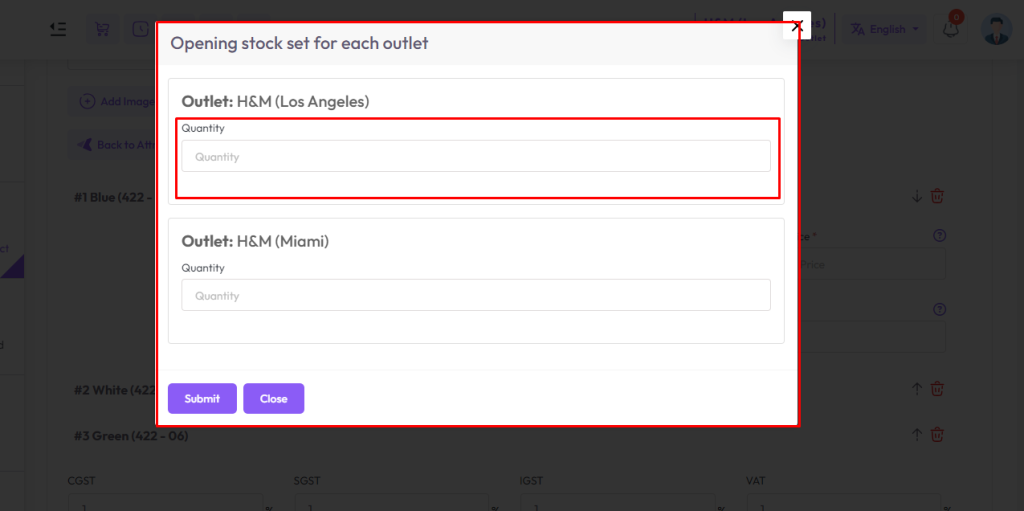
After clicking on the outlet field you will see a modal like below.
Enter the quantity in the quantity field under the outlet to set the stock per outlet.
Submit after giving the quantity.
Click image icon to provide image for variation item.

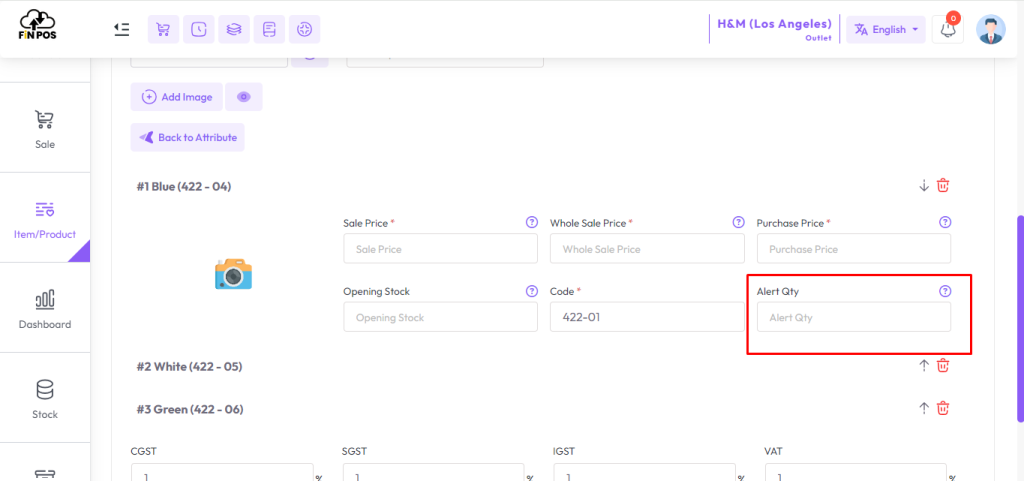
Alert Quantity: It refers to the minimum quantity of a product or item that triggers an alert or informs the relevant personnel that the stock level has reached a predefined threshold
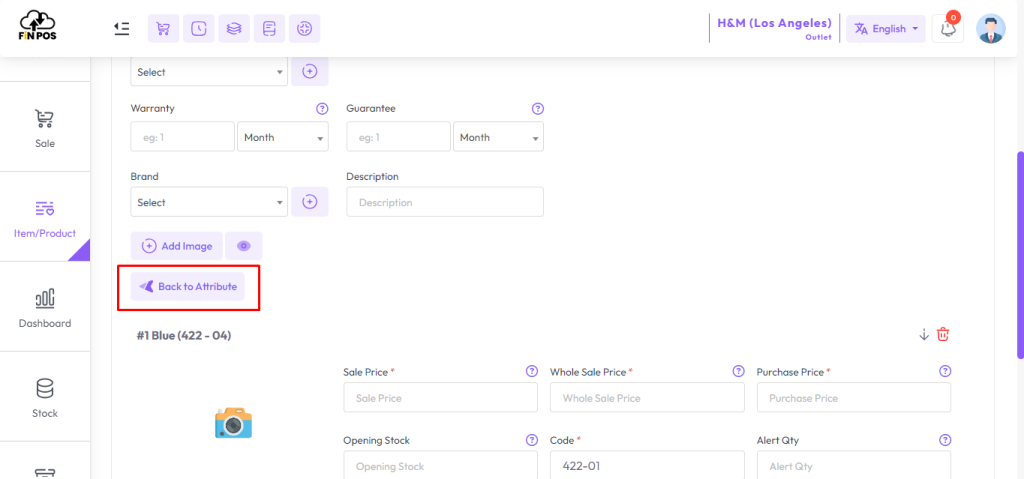
Click the Back to Attributes button to generate the variation again.
Click the Add Variation Attribute button to create a new variation.
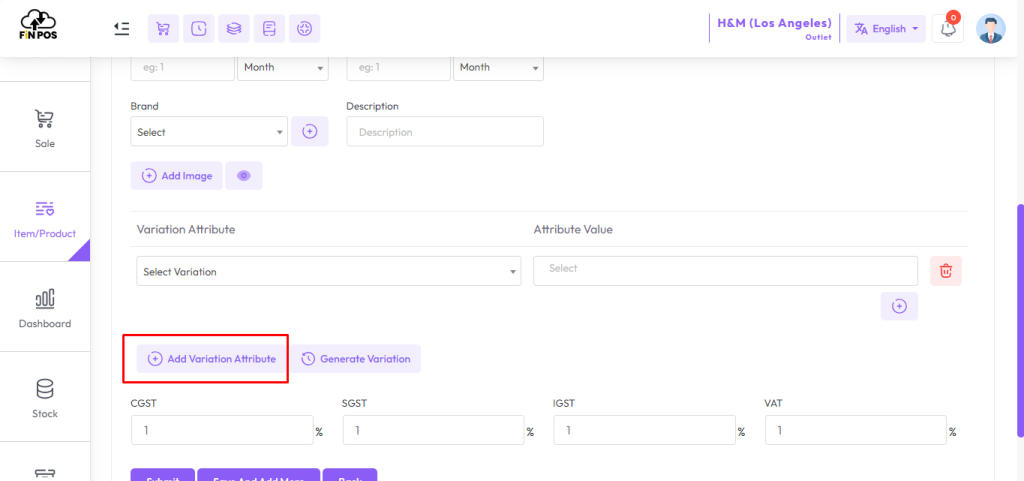
After clicking the Add Variation Attribute button, you will see an interface like below.

Short summary of variation products.


List Item
To view and manage the details of a Variation Product List, you need to navigate through the product management menu in FiNPOS. Follow these steps:
Expand the Item/Product menu from the left sidebar.
Click on the List Item option.
From the list, locate and click on the selected areas button.
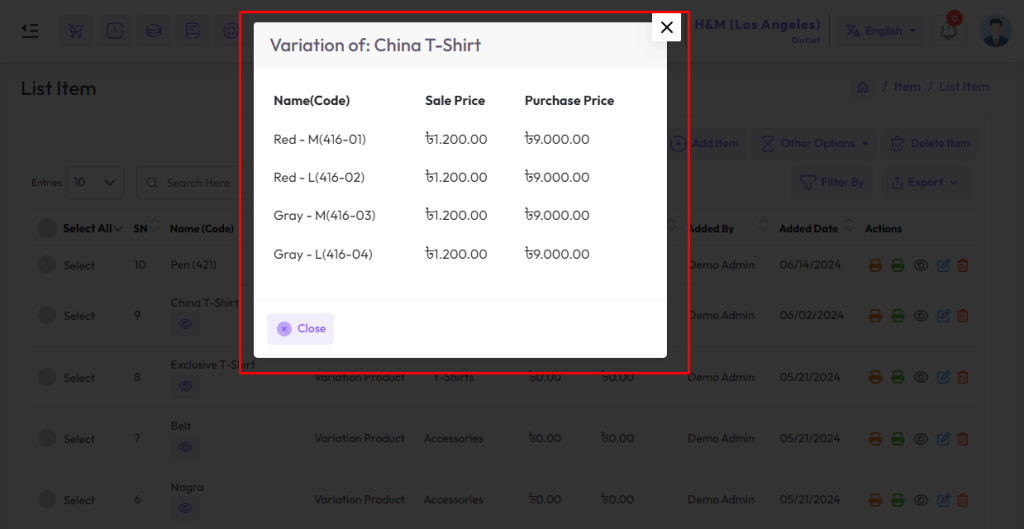
The system will display all the Variation Products with their defined attributes and values.
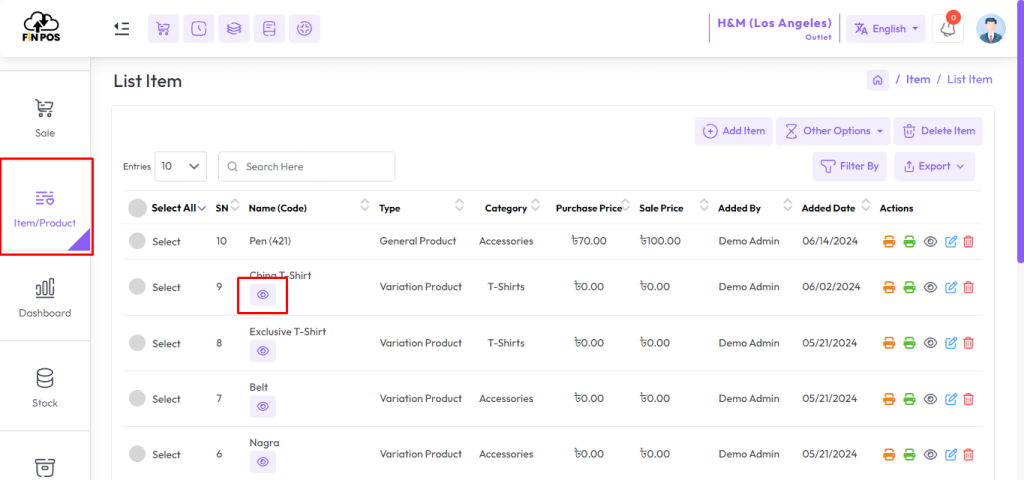
Then you will see the modal, where the list of variation products will be there.
You can filter items by Category And Supplier from List Items, You can also print barcodes, print barcode labels, and view Item details also.