Sale Return (General Item)
Home / Documentation /
⚙️ Getting Started
🏪 Outlet
⚙️ Settings
🏧 Working With Counter
💰 Working Denomination
🛒 Make a Test Sale
👥 Employee Management
📅 Attendance
📋 Working with Tax
🏦 Account
📦 Working (General Item)
📦 Working (Variation Item)
📱 Working (IMEI Item)
🏷️ Working (Serial Item)
💊 Working (Medicine Item)
💳 Working (Installment Item)
🔧 Working (Service Item)
📊 Stock (General Item)
📊 Stock (Variation Item)
📊 Stock (IMEI Item)
📊 Stock (Serial Item)
📊 Stock (Medicine Item)
📊 Stock (Installment Item)
📥 Purchase (General Item)
📥 Purchase (Variation Item)
📥 Purchase (IMEI Item)
📥 Purchase (Serial Item)
📥 Purchase (Medicine Item)
📥 Purchase (Installment Item)
🏷️ Barcode & Label
🖨️ Working with Printer
🛒 Sale (General Item)
🛒 Sale (Variation Item)
🛒 Sale (IMEI Item)
🛒 Sale (Serial Item)
🛒 Sale (Medicine Item)
🛒 Sale (Installment Item)
🔧 Sale (Service Item)
🌐 Multivendor e-Commerce
📧 Working with Email
💬 Working with SMS
💳 Payment Gateway Setting
💬 Working with WhatsApp
👤 Working with Customer
🏢 Working with Supplier
📤 Purchase Return (General Item)
📤 Purchase Return (Variation Item)
📤 Purchase Return (IMEI Item)
📤 Purchase Return (Serial Item)
📤 Purchase Return (Medicine Item)
📤 Purchase Return (Installment Item)
🔄 Sale Return (General Item)
🔄 Sale Return (Variation Item)
🔄 Sale Return (IMEI Item)
🔄 Sale Return (Serial Item)
🔄 Sale Return (Medicine Item)
🔄 Sale Return (Installment Item)
📊 Dashboard
🎁 Promotion & Coupon
🏆 Loyalty
💳 Installment Sale
🔧 Warranty/Servicing
📈 Income
📉 Expense
💰 Salary/Payroll
📋 Quotation
🔄 Transfer (General Item)
🔄 Transfer (Variation Item)
🔄 Transfer (IMEI Item)
🔄 Transfer (Serial Item)
🔄 Transfer (Medicine Item)
🔄 Transfer (Installment Item)
❌ Damage (General Item)
❌ Damage (Variation Item)
❌ Damage (IMEI Item)
❌ Damage (Serial Item)
❌ Damage (Medicine Item)
❌ Damage (Installment Item)
🏢 Fixed Asset
📊 Report
🔄 Update Software
❌ Uninstall License
A sale return occurs when a customer returns items they have previously purchased from a seller. This can happen for reasons such as dissatisfaction with the product, receiving damaged products, or changing one’s mind about the purchase. The seller then typically refunds the customer’s money or offers store credit for the returned items. Sale returns often involve updating stock records and may impact the seller’s financial statements.
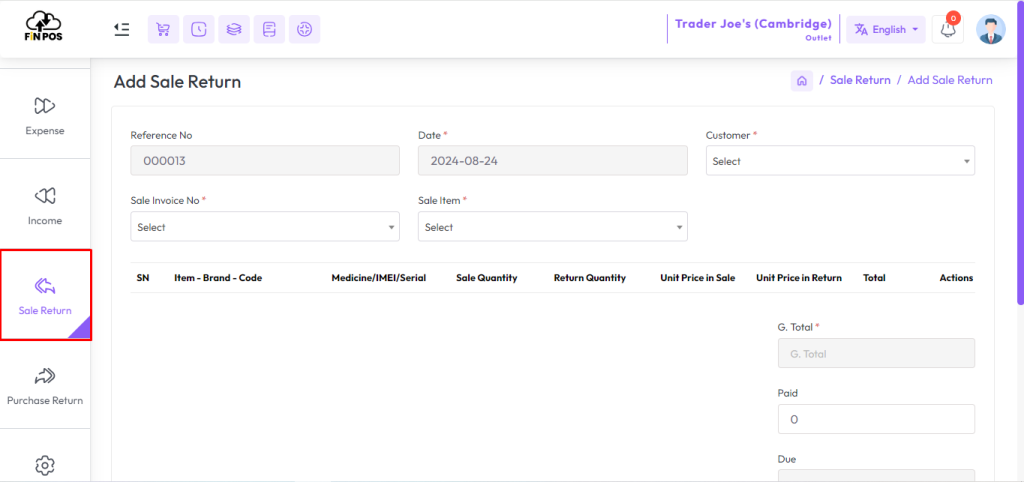
Add Sale Return
To add a sale return for a general product, go to the Sale Return section.
Expand the “Sale Return” menu from the left sidebar.
Click on the “Add Sale Return” option to continue.
This will open the form where you can enter return details.
Expand the Sale Return menu from the sidebar
Click on Add Sale Return option
Access the return form for general product
Proceed to enter the required details
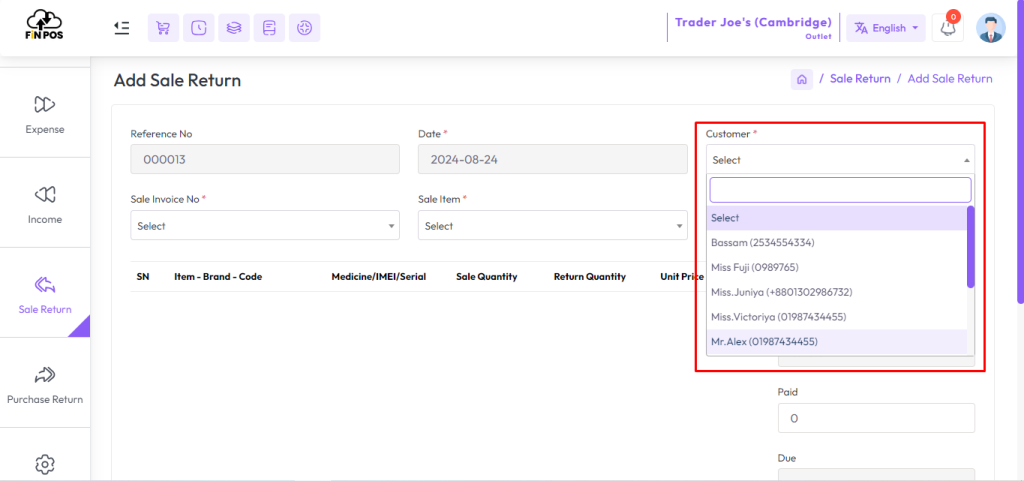
Select customer first when making a sale return.
No data will be displayed in the sales invoice and item fields unless the customer is selected. Because those fields are generated based on the customer.
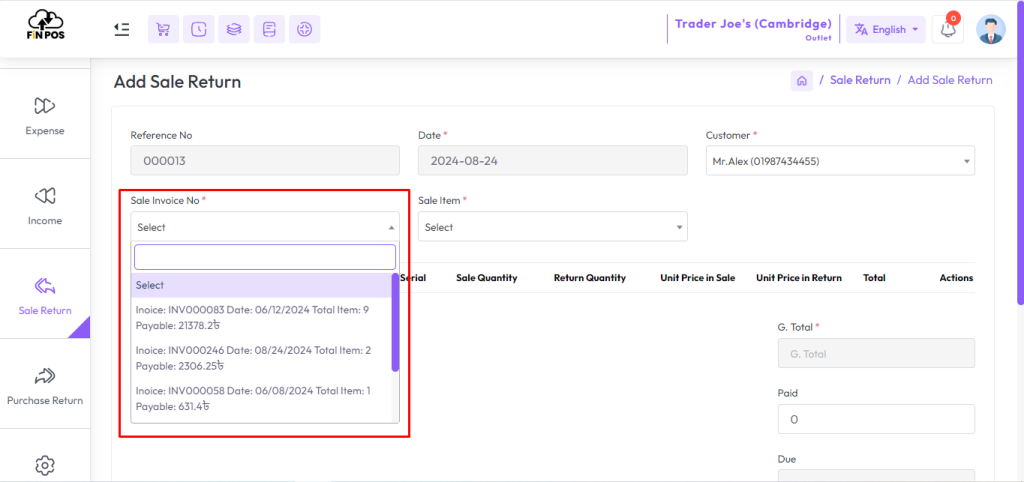
After that, you need to find the related invoice for the general product return.
Enter the invoice number in the search box.
From the results, select the correct invoice from the list.
This will link the return with the right sale record.
Search the invoice by Invoice Number
Locate the invoice from the list
Select the correct invoice
Link it with the return process
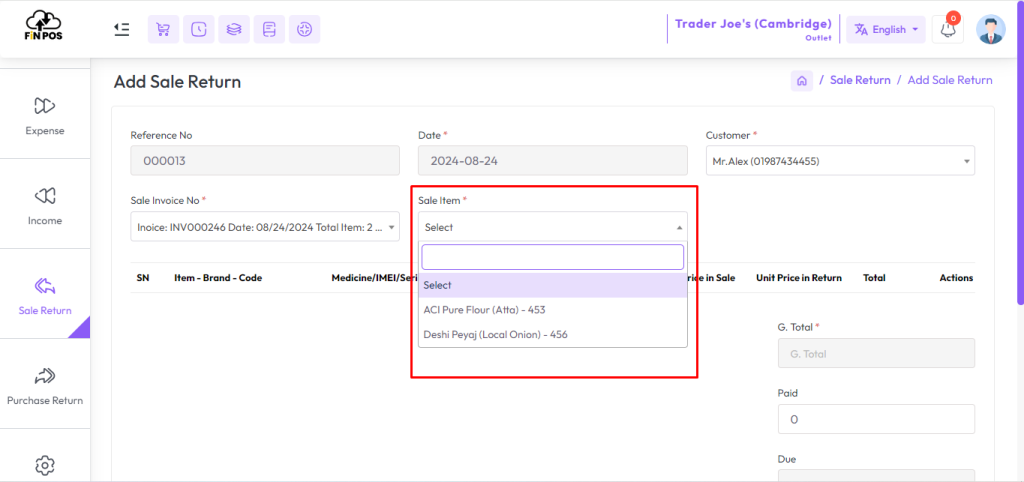
After selecting the invoice, the related items will automatically appear in the item field.
You will see all products linked with that invoice.
Select the specific items you want to return.
Choose them one by one to proceed with the return process.
Invoice items are generated in the Item Field
View all products linked with the invoice
Select the items to be returned
Choose items one by one for return
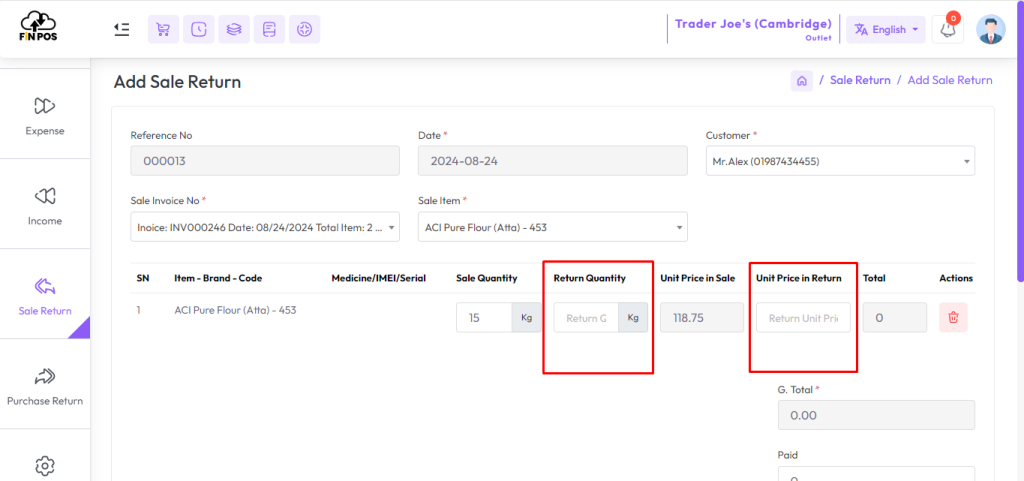
Next, you need to enter the return details for the selected items.
Type the return quantity in the Return Quantity field.
Enter the return unit price in the Unit Price in Return field.
The system will use these values to calculate the return amount.
Enter the Return Quantity
Enter the Return Unit Price
Double-check the entered details
System calculates the return total
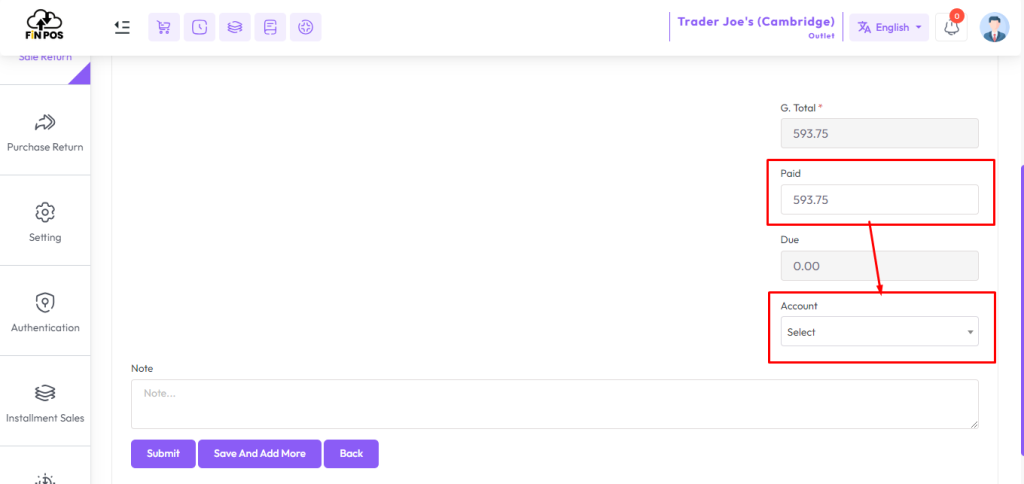
Finally, complete the payment details for the return.
Enter the paid amount in the Paid field.
Select the payment method from the Account field.
Click the Submit button to save and finalize the general product return.
Enter the Paid Amount
Select a Payment Method from the Account field
Review all details carefully
Click Submit to complete the process
List Sale Return
To view a list of sale returns, go to the Sale Return section.
Expand the “Sale Return” menu from the left sidebar.
Click on the “List Sale Return” option.
This will display all the sale return records in a list format.
Expand the Sale Return menu from the sidebar
Click on List Sale Return option
View all sale return records
Manage or review the return details
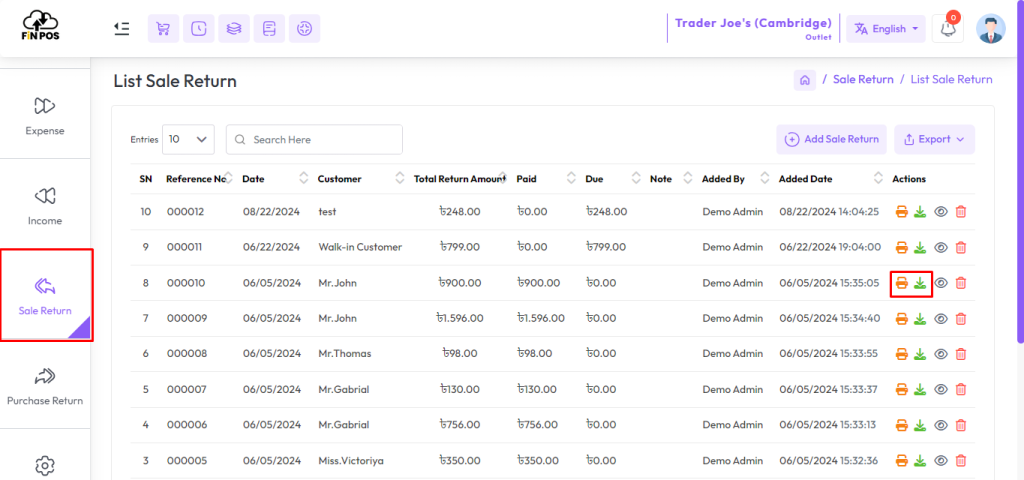
Click on the “Print Invoice” and “Download Invoice” buttons from Actions to print and download the “Sale Return Invoice”.
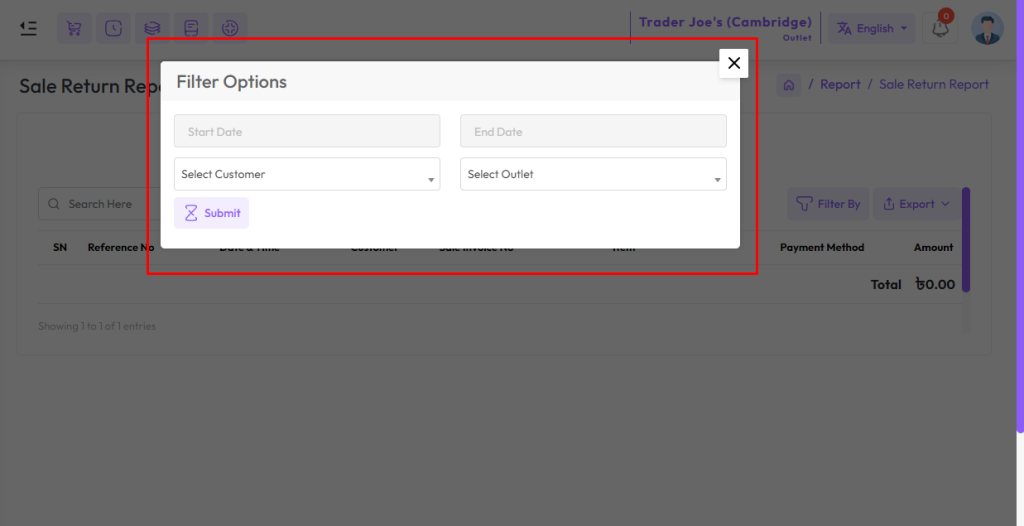
Sale Return Report
To view the “Return Report” expand the “Report” menu from the left sidebar and click on the “Return Report” menu.
Select a date to view the report within a specified date if needed. select a customer also you can select outlet from the outlet field to filter report according to outlet.